Update Atlas Documentation
We encourage you to expand and customize this documentation for your own use. To suggest edits to this documentation, please open an issue on this repository in GitHub.
Fork this repo
The best way to update Atlas documentation is to fork this repository (requires a GitHub account). Once you have forked the repository, follow the process below to serve this documentation in your own GitHub pages site.
- Edit the
edit_urivariable in the filemkdocs.yml(line 3) by changing the user name in the url fromeanderson-eito your user name. This will allow you to edit your fork of the documentation.
- In your repo on GitHub, open the Settings tab and select Pages.
- In the Build and deployment section, under Source select "Deploy from a branch".
- Under Branch, select the
gh-pagesbranch. - Click Save.
GitHub requires a few seconds to create the site, but soon you'll find the link to the site under Settings > Pages. This is also where you can unpublish a site.
You will now be able to edit the documentation directly by clicking the edit icon for each page.
Editing pages
- To edit a page, first click the edit icon in the top right of the page (the home page is the only page that does not display this icon).
- Make the desired edits in the Markdown editor
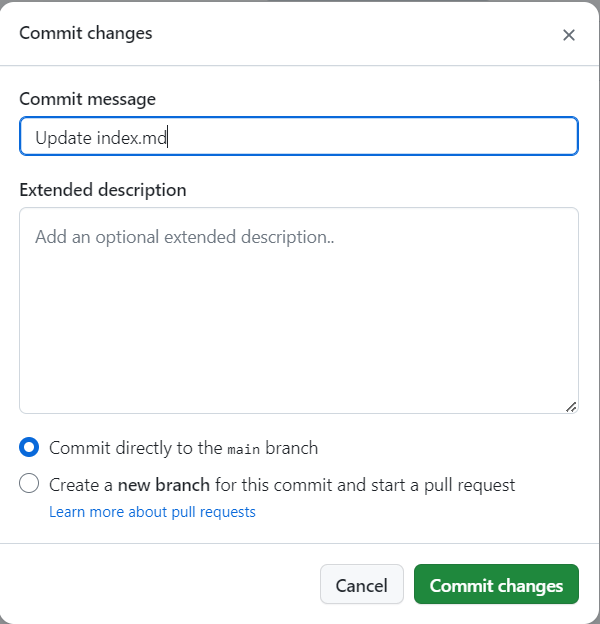
- Click the Commit changes button to save your changes.
- A dialog box will open. Optionally, edit the commit message and extended description.
- Ensure that Commit directly to the
mainbranch is selected. - Click the Commit changes button.
After a few minutes, the documentation will be updated.
To learn more about the Markdown syntax check out the Markdown Guide. Some syntax is specific to the Material for MkDocs package and extensions.
Download documentation
Alternatively, you may download the contents of this repository as a zip file. On the repository home page, click the green Code button and select Download ZIP. Documentation is stored in the docs/pages directory. We recommend editing documents in a Markdown editor, however documents may be edited as plain text.
Update Mission Database Schema
The Mission Database schema is available through dbdocs.io. The link to the documentation is included in the mission-database.md file in docs/components.
Create DDL files
Using the Data Steward Admin Tool, create the SQL files to specify the DDL from each data source. The function is write_ddl for each .gs file.
Download the files from the Data Admin SQL folder on Google Drive and save them to the sql/ddl directory in the project repository.
Upload to dbdocs
- Go to dbdocs.io and load the create_<>.sql files for the schema you want to display. Make sure
appendis selected. - Copy the contents to the
dbdiagram.dbmlfile in root directory. - Upload to dbdocs.